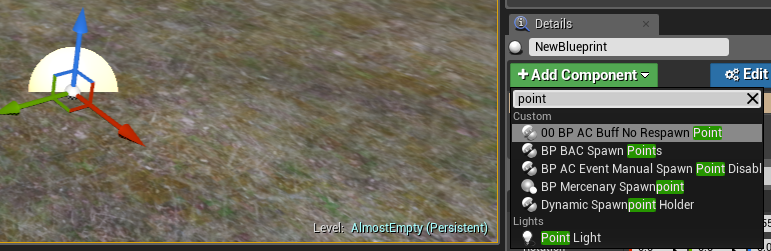
The intention behind this primer is to increase productivity and workflow for common operations in the Unreal Editor. It’s not meant to detail specific workflows within blueprints or world editing, etc. We will cover how to quickly find assets and how to work with the editor in an efficient manner.
Content Browser
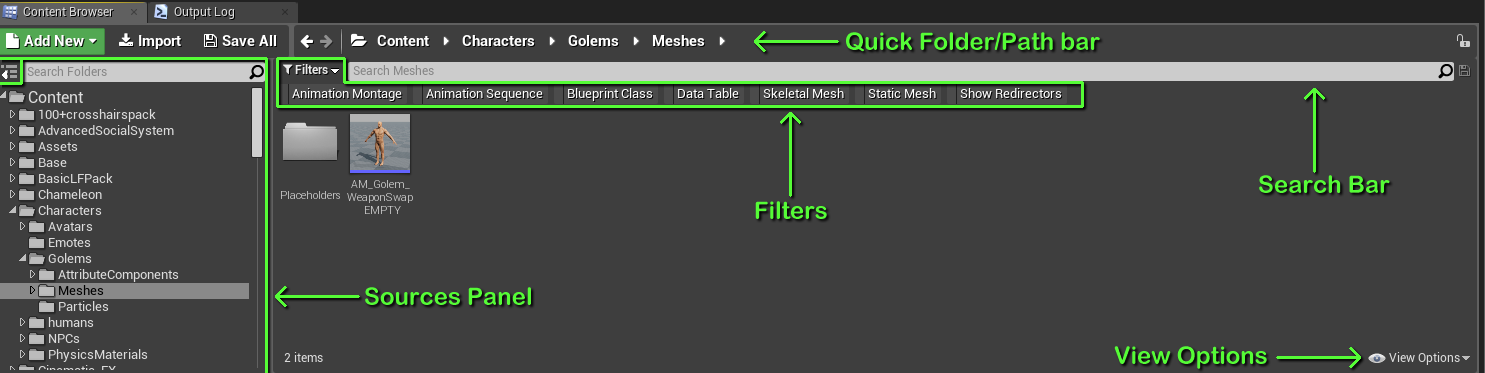
The image below shows the layout of the fully featured Content Browser. This may seem basic but we will talk about certain parts of the Content browser, so this can be used as a reference when we mention them by name. It’s also worth noting that if this is the first time you open the Unreal Devkit, the Sources Panel may be closed, in which case you can open it by clicking the button on the far left.
Filters
Filters allow you to set up easily accessible filtering options for types of assets. Depending on what you work on, this might be Static Meshes, Blueprints, or other types of filters. Activating a filter shows all the assets of that specific type in the current folder, and any sub-folders. This means that if you want to find all the Static Meshes in the editor, you can use the StaticMesh filter and simply click the root Content/ folder to get that list.
Collections
Collections serve as a way to organize sets of assets into personally defined groups, like folders. For instance, you may find it useful to create a Collection of all environment-based Static Meshes that fit a certain visual style, for quick access later. This can significantly increase the speed of worldbuilding.
You can read the full Unreal Documentation about collections here: https://docs.unrealengine.com/4.27/en-US/Basics/ContentBrowser/UserGuide/Collections/
Searching
The search bar has some hidden functionality that you may or may not be aware of. Most commonly, searching for a partial or complete single name (e.g “SM_1h_cleaver_steel” or “SM clea stee”) will allow you to find individual assets that match the name. It’s important to know that all search terms separated by a space (“ “) are inclusive, meaning that assets must have all the separated search entries in the name.
However, there are more efficient ways of searching that allows you to easily search for entire groups of objects:
Advanced searches (AND, OR, NOT)
As an example, search for: “icon AND cleaver OR sickle”
This will show any assets named “icon” and also have either “cleaver” or “sickle” in the name. Note that the AND/OR must be in capitalized letters. You can use this together with filters to create very powerful searches.
It’s also possible to separate search-terms by wrapping them in paranthesis (). Doing so separates them from the rest of the search-query.
As an example, here is a search that shows all the StaticMeshes that has the name “cliff” or “rock” but not the name “highland”:

Meta-Data Searches
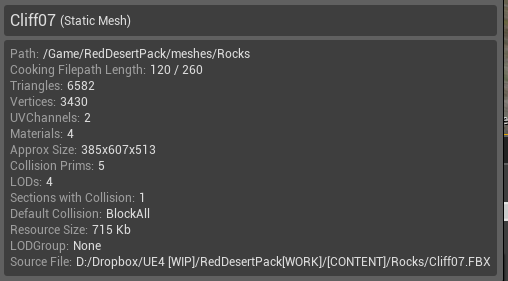
It can also be useful to search for certain meta-data tags. Let’s say that you want to find all the staticmeshes that has a triangle-count lower than 500. If you hover over any asset, you will see an image that looks something like the image on the right, where it lists all the different types of meta-data.
This meta-data can also be used to find assets that match your search criteria.
As an example, the search below will show all the static-meshes in the devkit that has less than 500 triangles and a material count that equals 1 that exist inside the “Player_Built” folder. Worth noting is that the Player_Built folder here is used as a name-search, as that is not technically meta-data (although it will show up in the meta-data as “Path”).

Finding asset folders
Many times, it’s required to find where a specific asset exists - perhaps it’s because you need to find siblings or related assets, or maybe it’s simply because you need to go to that folder. There are a couple of quick ways of navigating to a folder where an asset exists.
-
Meta-data “Path”
-
As covered before, hovering over an asset will show you the path (at the very top) of the meta-information
-
-
CTRL-B
-
Clicking on an asset, and then pressing CTRL-B will instantly take you to the folder where that asset exists. This will clear your search terms.
-
-
Copying the Object path
-
By right-clicking an asset and selecting “Copy Object Path”, you will copy a string into your clipboard (e.g “/Game/Environment/Player_built/Meshes/SM_alchemy_placeable_bookshelf_dust.SM_alchemy_placeable_bookshelf_dust”)
-
Colormarking folders
There is also the possibility of marking folders with specific colors so that you can find them again.
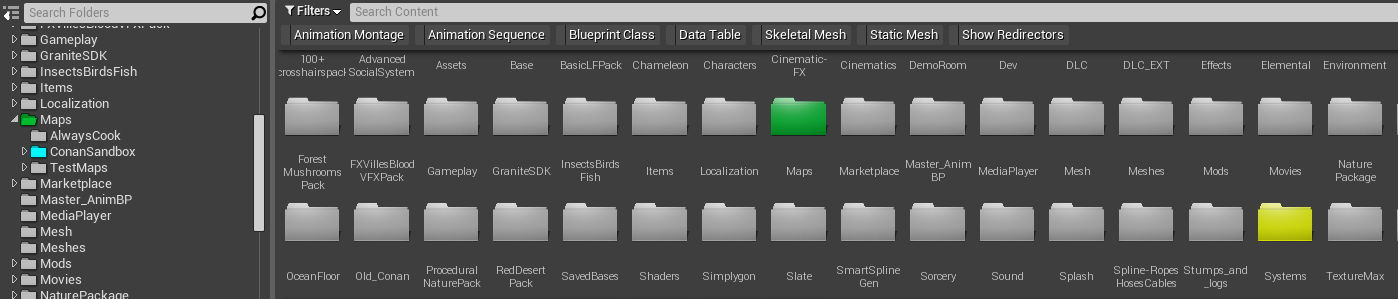
To do this, right-click the folder, and select “Set Color”. This will permanently mark the folder with this color, which makes it much easier to find later on.
Batching Work
The time may come when you need to perform the same operation on multiple assets. Opening them up and doing the same thing over and over can be very time-consuming and so batching work together will save considerable time.
Bulk Editing via Property Matrix
One of the most powerful batch-editing tools in the devkit is the ability to bulk edit assets. In order to do so, select all the objects you want to bulk edit (make sure they are of the same type and have the same type of data - bulk editing will only show variables that are common amongst all the selected assets).
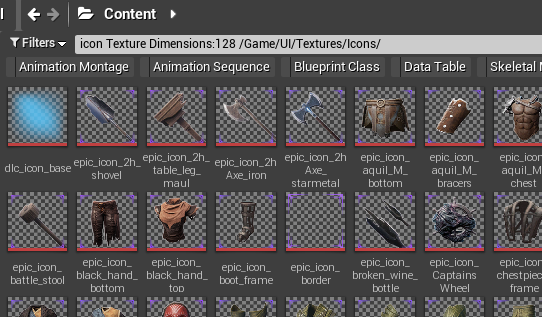
In the image below, the search has resulted in all textures with the name “icon” in it that has dimensions of 128, and that exists in the Game/UI/Textures/Icons/ folder.
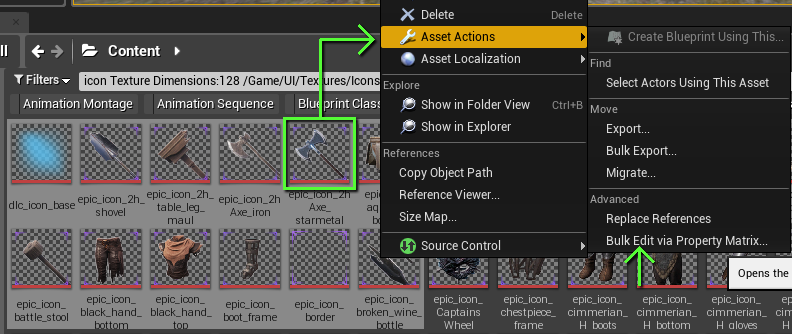
Mark all of these, right-click one of them, and selecting “Asset Actions/Bulk Edit Via Property Matrix”.
You will end up with something that looks like the image below.
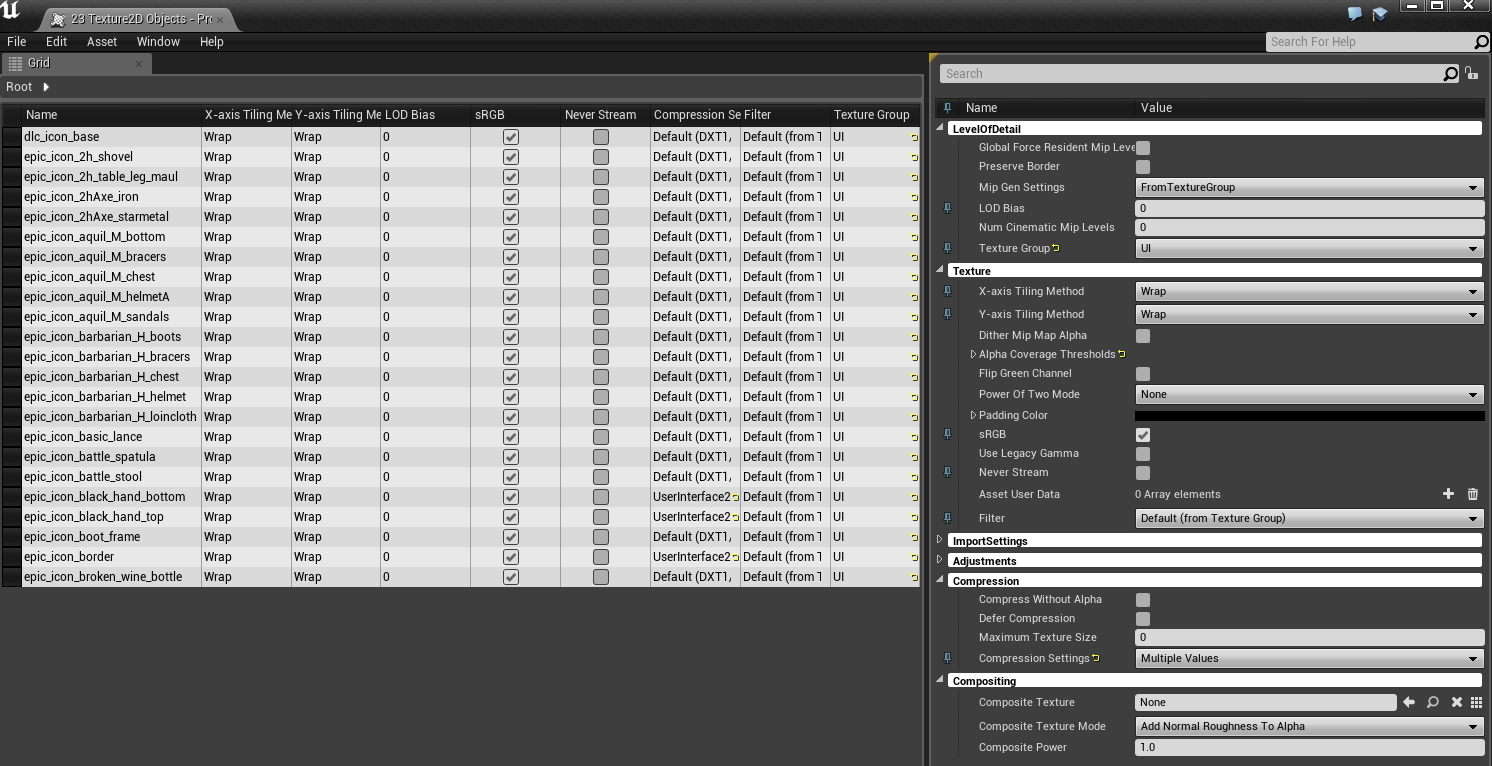
On the right-hand side, you can edit all the variables that the objects have in common. If objects have different setups (for example, you can see that some of these icons have different compression settings), you can easily see this, and change them.
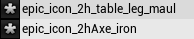
Once you do, you will notice that a Star appears left of the asset in the list like in the image on the right. This means that the asset has been changed. To save your changes, go into the “File” menu and select “Save All”, or simply press CTRL-SHIFT-S.
Note : Even though the example above deals with a very simple type of asset (a texture), this does work just fine for blueprints and other assets as well.
Editor Shortcuts
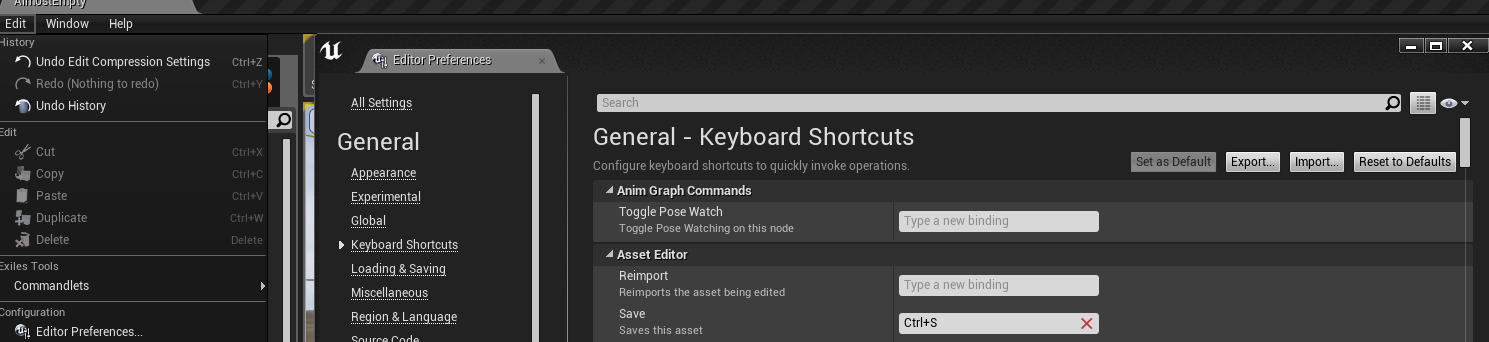
The Unreal Editor can be set up with shortcuts, and these are quite useful to know about. To set up your own shortcuts, go to the “Edit” menu, and select “Editor Preferences”
In this primer, we will not cover all of the shortcuts; instead, we will highlight some important ones that are easily overlooked.
Common Shortcuts
|
Shortcut |
Type |
Function |
|---|---|---|
|
CTRL-W |
Content Browser |
Duplicate selected asset |
|
ALT-SHIFT-R |
Content Browser |
Open up the Asset Reference Viewer |
|
CTRL-P |
Generic |
Open up the Asset Search quick widget |
|
CTRL-B |
Generic |
Go to selected asset’s folder |
|
SHIFT-F11 |
Generic |
Enter/Exit Fullscreen |
|
G |
Viewport |
Turn on/Off “Gameplay” view |
|
F |
Viewport |
Focus on selected object |
|
CTRL-R |
Viewport |
Toggles Real-time rendering in the viewport on/off |
|
T |
Viewport |
Toggles the ability to select things without collision |
|
SHIFT-E |
Viewport |
Selects all assets of the same kind |
|
CTRL-E |
Viewport/World Outliner |
Edit selected asset |
|
F8 |
While playing |
Possess / Eject player |
Note : Recently, we changed the ESC button from exiting to the editor; now the behaviour is as it is in the game itself, and SHIFT-ESC instead takes you back to the editor.
Working with Data Tables
Designers and modders both utilize Data Tables to a great extent - in particular the ItemTable, FeatTable, and Recipes Table.
Searching Data Tables
Searching data tables doesn’t work in the same way as searching the Content Browser. However - there are still some tricks that can be utilized here.
Complete/Partial strings or TemplateID
Strings like “Voidforge” or “Hammer” will work fine, as will “10010” (Template ID / Row Name). It’s not possible to use AND/OR searches here though.
Asset referencing
If you have the name of an asset, or an asset path (from right-clicking an asset and selecting “Copy Object Path”), you can paste this string in and it will find it as well
ItemTags
Another method of searching is similar to pure text search but instead you can search for item-tags. As an example; “Item.Weapon.Mace” will show all items with that itemtag.

Export/Import
Exporting and Importing tables is a good thing to know about. It can be used to take backups of your data-tables before doing major changes, it can make creating massive amounts of data entries much easier, and it allows you to manipulate the content in an editor such as Excel, Notepad, or Notepad++.
To Export a table, find it in the Content browser, right click on it and select “Export as CSV“ or “Export as Json”. You can then view this exported file in (for example) Notepad++ and do text edits such as search-replace, etc, in that editor. We won’t go through these external programs in detail but suffice to say that it’s much easier to mass-edit table entries in Notepad++ than in Unreal.
To Import a table, open the table you want to import, then select the “Asset“ menu, and “Reimport…” - you will get a windows file-selector where you can select the file you want to import from (CSV or JSON).
Important notes:
-
The first time you import a table from a location, the location for that is saved in the meta-data of the table. This means that you can keep your CSV/JSON version of the table handy for future imports, or delete it. If you keep the file, the editor will import from that file every time. If you delete the file, a new window will prompt you for the location of where to import from.
-
It can be very easy to mess up formatting for CSV and JSON files. For example - putting in a new line with enter in the middle of text will break imports, as will using specific types of ascii symbols like ; , “ and ' so be careful.
Copy-Pasting in Unreal
Actors
There are multiple ways of copying actors in a level in Unreal, and many reasons why you would want to do so.
Example: You are creating a new map. You might want to copy things from the ConanSandbox map such as the UltraDynamicSky, weather setups, and light sources.
Example: You are testing newly made blueprints or features. You may want to copy and paste them within the “AlmostEmpty” level.
Example: You are making a new dungeon. You may want to work with the layout in the AlmostEmpty level instead of directly in the world-map, since it is much faster to load.
The easiest way to copy and paste actors is to simply mark them into the world outliner and click CTRL-C. This will copy all the actors (including their rotation and location) to the clipboard, which then allows you to paste these in later on. It can also be used as an effective way of storing temporary setups:
-
Mark all the actors that you want to copy
-
CTRL-C
-
Open Notepad
-
CTRL-V
-
Save the file
The contents of this file can then be copy pasted back into unreal at any time if you need the exact same setup again.
You can also copy and paste actors between levels - for example: you can copy the UltraDynamicSky blueprint from the ConanSandbox map and paste it into your own map mod.
Variables and Arrays
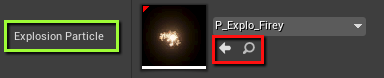
Sometimes you might want to copy the content of a variable into another location. For regular INT and Float values, this is simple enough but what if you have a variable that is pointing to an asset, like in the image on the right?
One way of doing this is to use the “Browse” and “Use” buttons (marked in red) but a faster way of doing it is to right click in the area marked in green and select “Copy”.
This method of copy pasting data is often overlooked but is very useful to know about. It also works for arrays, colors, vectors, etc.
The reason this is very useful is because you can paste the array into notepad and edit the array in there and then paste it in elsewhere or on top of the former array.
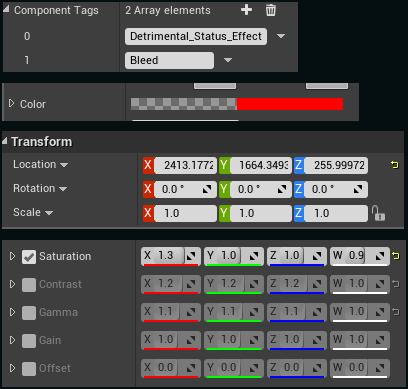
If you have very long arrays (such as Compatible Ammunition, Black/White lists for inventories, or long sets of data such as the Post Processing setups in the UltraDynamicSky blueprint), copy-pasting, or editing these arrays in Notepad makes life much easier.
Data Tables
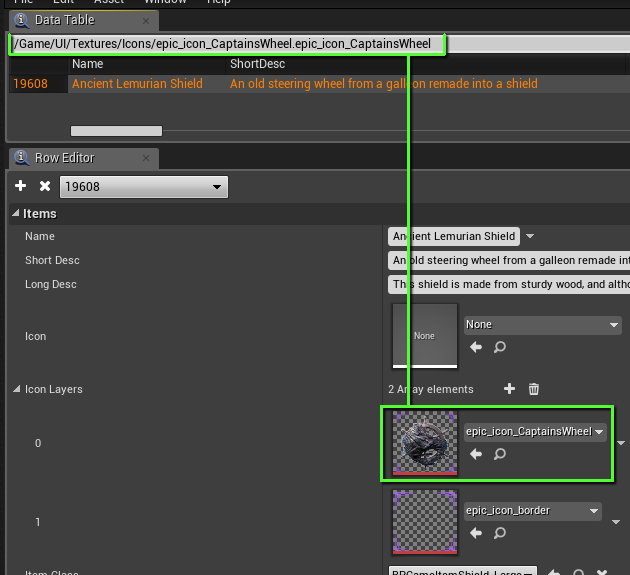
Copying and pasting data table rows is another useful trick to know about. A good example of this is a table that has a numerical row name such as the ItemTable (but it does work for other tables as well).
It is possible to copy and paste individual rows or multiple rows by simply right clicking and selecting “Copy” or clicking one row, then holding down Shift and then clicking another row. This will mark all the rows. Now simply right click on one of the marked rows and select copy.
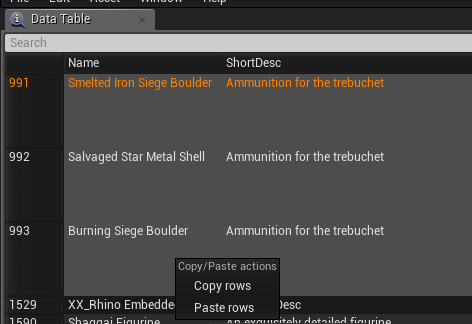
To paste rows, right click on one of the rows inside the table and select “Paste”. New rows will be inserted and given new numbers (row names). These numbers will be followed sequentially from the list of rows that you marked.
Note : this trick works best if you mark rows that are sequentially numbered. If not, you may run the risk of row names already existing. If this is the case, on the real will tell you and ask if you want to overwrite or append these rows.
Blueprints
One of the most commonly used applications for copy paste is within blueprints. Simply mark all the nodes that you want to copy to another place and press CTRL-C. Pasting them into another blueprint is as simple as then opening up that blueprint and pressing CTRL-V.
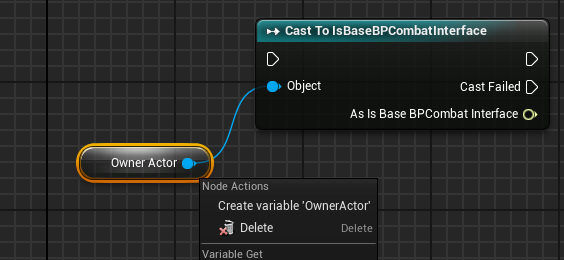
Worth noting here is that if you are copying nodes that link to functions that do not exist in the target blueprint, these will not work. You may also have to create the variables that are missing from the target blueprint. This is the easily done by right clicking any of the grayed out variables in the blueprint graph and selecting “Create Variable”.
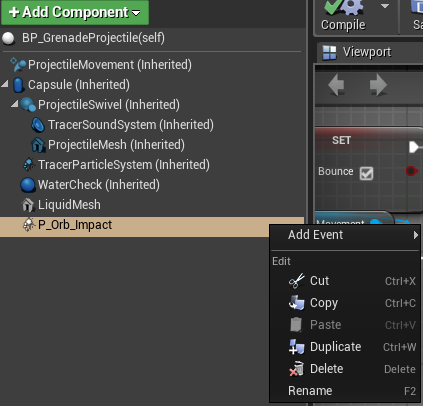
It is also possible to copy and paste components between blueprints:
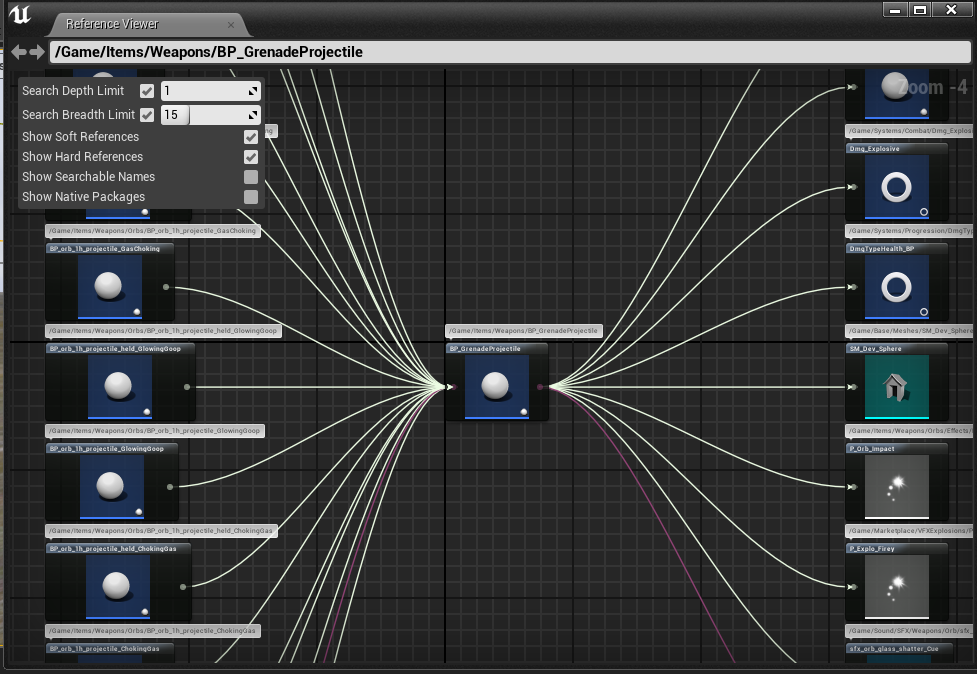
Using the Reference viewer
The reference viewer in unreal allows you to find other assets and actors that point to this object as well as what other assets and actors that this object points to. This can be useful in many ways:
-
Finding what level the object is placed in
-
Finding the parent/s of a blueprint
-
Checking that the base game uses this object
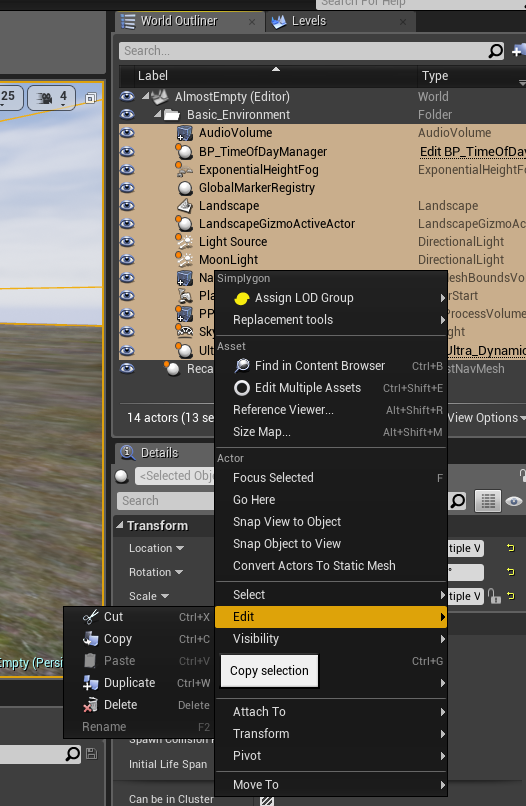
By right clicking on an object in the content browser and selecting reference viewer, a new window will open and on the left-hand side you will see all the objects that is referencing the selected object and on the right hand side you can see all the objects that the selected object in turn links to.
For modders, one of the most important things to keep in mind is that not all objects are part and parcel of the base game. Many static meshes and blueprints exist in the devkit but if used, will never load in the base game. The reason for this is that the base game does not contain these objects and so in order to use them you will have to make a copy of them in your local mod folder.
Given that most staticmeshes or blueprints are loaded through either the map itself or one of the key tables (ItemTable, EquipmentVariationTemplateTable, SpawnDataTable, etc), following the chain of references up from your selected object and checking that it does ends in a level or table, the object can be used.
There are exceptions to this (some meshes are used in the Isle of Siptah but the reference viewer will not show the link to those levels, since they are not part of the devkit) but as a general rule it's a good one to follow. If you are uncertain if an object is used or not, you should reference it in your mod (or a test mod) and see if it works in the game. If it does not, then you will need to make a copy of it.
Blueprint tips and tricks
There are many ways to save time and be more efficient with blueprints. This section will not deal with all of them, but highlight some general tips and tricks as well as some lesser known, specific workflows.
General Tips and Tricks
Instead of dragging a variable and then selecting Get/Set, you can drag a variable out by using CTRL or ALT
-
Get: CTRL-Drag
-
Set: ALT-Drag
Node-Manipulation
-
Hold CTRL and click on a pin to start dragging wires, this allows for quickly re-routing existing wires to other nodes.
-
Select a node or nodes and press CTRL+W to duplicate them.
Comment-Boxes
-
Select nodes and press C to quickly create a comment box around them.
-
Contents inside a comments-box can be dragged by just moving the comments box
-
Easy Kitbashing
Creating a new visual for a blueprint can be very easy. Instead of trying to build a visual up from various meshes in the viewport of a blueprint, try this:
-
Build the visual in the AlmostEmpty level
-
Mark all components of the kitbash
-
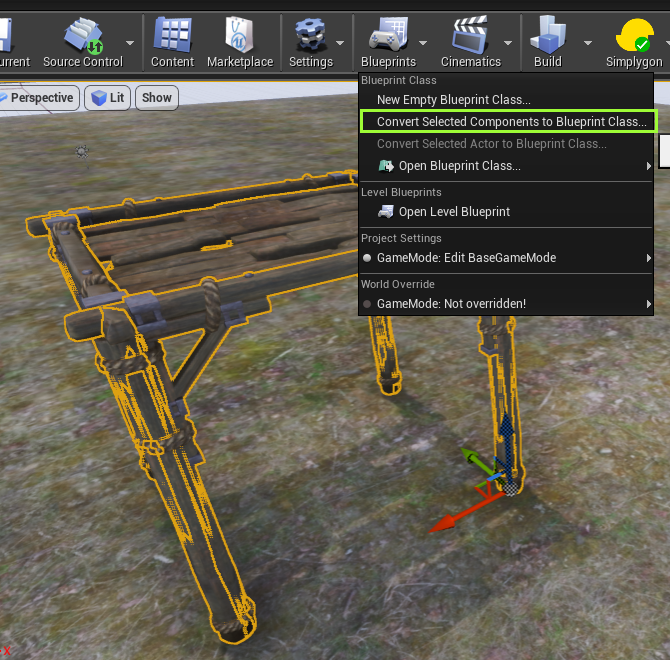
Go to the Blueprints button at the top and select “Convert selected components to blueprint class“
-
In this new blueprint, mark all components including the SharedRoot component and copy them (CTRL-C)
-
Open (or create) the blueprint you want the kitbash to be in)
-
Right-click in the components list and select “Paste”
The components from the kitbash blueprint will now appear in the correct blueprint. You might want to make some final adjustments and also remove the SharedRoot component since it’s no longer necessary, but this method of making kitbash placeables, crafting stations or just collections of objects is quite quick and easy once you get used to it.
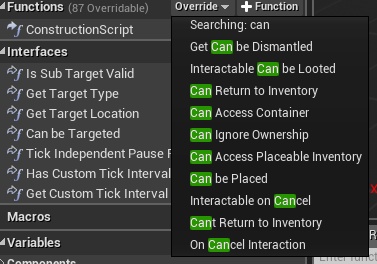
Searchable Override Functions
At times, you will want to override functions from a parent blueprint, but finding the name can be arduous. There is, however, a hidden functionality that allows you to search for the name of a function:
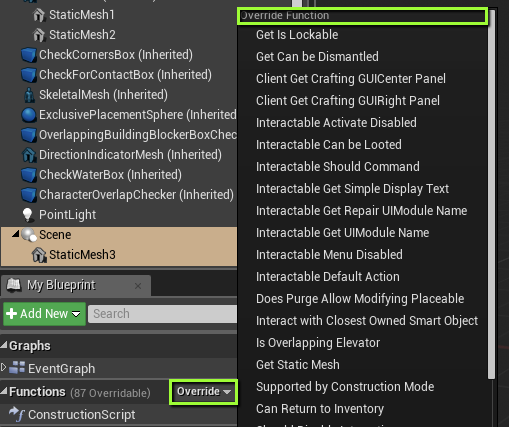
By clicking “Override” and then in the top part of “Override Function” list, you can start typing and the list will filter for your search:
Blueprints with dynamic components
This tip is particularly useful for map-makers or when blueprint actors are spawned in from other systems.
If you have a blueprint that performs a specific function (let’s say that it turns on all the lights in the blueprint at a given time of day), you could make a blueprint that has a certain amount of lights in it, but then you will always be locked into that amount. Instead, there’s a better way of doing this, which is to create the logic for the blueprint, but instead of referencing specific components in the blueprint, you can use the “Get Components by class” node, and loop through those instead (see below).
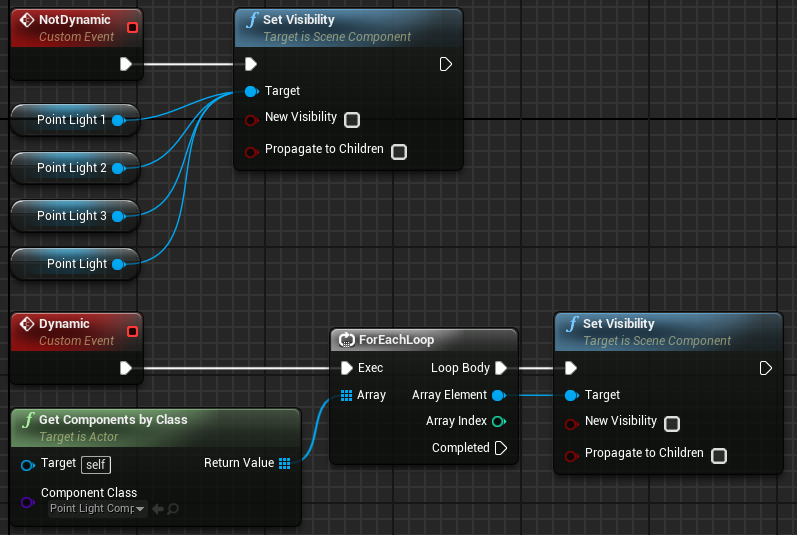
You can then place the blueprint in the world, and in the world editor itself, manually add the type of component you want to the blueprint: